
[Solved] Kindle Not Showing up on PC? 10 Fixes That Actually Work
Summary: If your Kindle cannot be detected by PC, the problem is usually caused by a charge-only USB cable, a faulty port, a Windows driver issue, or a temporary device glitch. Follow this troubleshooting tutorial to check each possible cause step by step and get your Kindle connected again.
Table of Contents
![[Solved] Kindle Not Showing up on PC? 10 Fixes That Actually Work](https://c2.dvdfab.cn/upload/bookfab/en/fix-kindle-not-showing-up-on-pc-0Ngu.jpg)
As a Kindle user for well over a decade, I've heard too many friends who are new to Kindle ask in frustration what to do when their Kindle is not showing up on a PC. If that's happening to you, there's no need to panic, because the problem may not be with the device itself. In many cases, the real cause is a charge-only USB cable, a faulty USB port, a Windows MTP driver issue, or a temporary Kindle glitch. In this guide, I'll walk through the most effective fixes on Kindle not connecting to PC step by step.
Quick Answer: Why Is My Kindle Not Showing up on PC?
If your Kindle is not recognized by your PC, the cause is usually one of a few common issues. In most cases, the problem is not the Kindle itself but the connection method or the computer's device recognition process.
- The USB cable is charge-only and does not support file transfer
- The USB port is faulty or unstable
- Windows fails to recognize the Kindle correctly
- The MTP driver is missing or corrupted
- The Kindle is frozen, locked, or not fully restarted
- You are dealing with a transfer limitation, not a true connection issue
You may be wondering: with so many possible causes, how exactly should you fix the problem? Below, I'll walk you through them one by one so you can troubleshoot and solve the kindle not appearing on pc issue step by step.
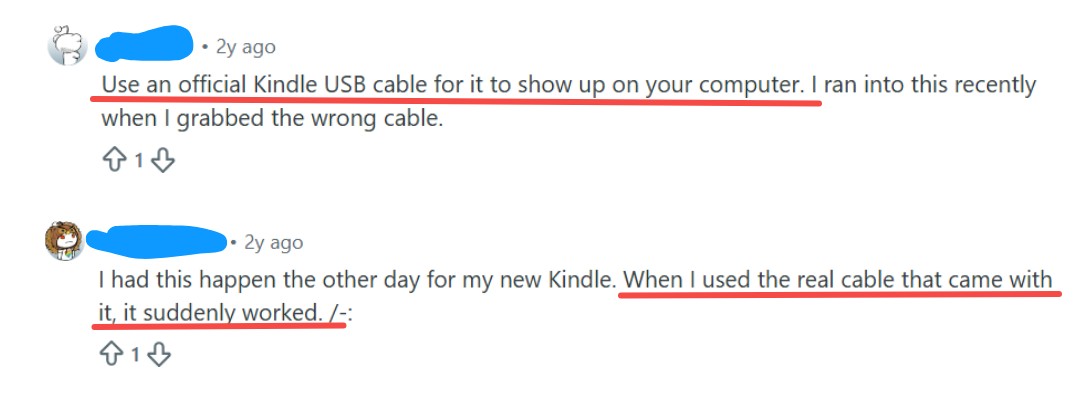
Fix 1: Use a Real Data Cable, Not Just a Charging Cable
If you notice that the Kindle charges after being connected to the PC, but nothing appears in File Explorer and Device Manager does not update either, the cable is very likely the problem.
The easiest fix is to replace the cable with one that supports file transfer. The original Kindle cable is usually the safest choice. If that is not available, use a cable that has already been used to transfer files between another device and the computer. Avoid old, loose, or damaged cables, because an unstable connection can also make the Kindle not recognized by PC.
Fix 2: Try a Different USB Port and Skip the Hub
If changing the cable does not help, plug the Kindle into a different USB port. Some ports can charge the device but fail to transfer data, which leads to a Kindle not showing up on PC problem.
Besides, do not connect the Kindle through a USB hub, docking station, monitor USB port, or adapter. Connect it directly to the computer instead. Then wait a few seconds and check whether the device appears in File Explorer. If the computer is not recognizing Kindle on one port, but it works on another, the issue is the original port or connection path, not the Kindle itself.
Fix 3: Restart Your Kindle
Another quick fix worth trying is restarting your Kindle. Press and hold the power button for about 40 seconds until the Kindle restarts. Wait for the device to fully turn back on, unlock the screen, and then reconnect it to your PC.
This step can clear temporary glitches that stop the Kindle from being recognized properly. If the device was frozen or stuck in an unstable state, a restart may restore the connection.

Fix 4: Test the Kindle on Another Computer
If you have another computer available, connect the Kindle to it with the same USB cable. This is a quick way to check whether the problem is with the Kindle or with your current PC. If the Kindle connects normally on the second computer, the issue is likely caused by your original computer's USB settings, driver, or port.
Fix 5: Charge your Kindle for a longer period
Leave your Kindle charging for at least 30 minutes before connecting it to your PC again. If the battery is very low, charge it for up to 1 hour, then unplug and reconnect it to the computer.
A Kindle with very low power may charge but still fail to connect properly. Once it has enough battery, the connection may return to normal.
Fix 6: Change the USB Connection Mode
Some Kindle devices may show USB connection options after being plugged into a computer, while many standard Kindle e-readers do not. This fix is more likely to help on models that expose a USB settings prompt, such as some newer Kindle devices and Kindle Scribe. If no USB option appears on your screen, skip this method and move to the next one.
Here's how to check and change it:
1. Connect the Kindle to your PC with a data-capable USB cable.
2. Wait a few seconds and make sure the device is awake.
3. Swipe down from the top of the screen to open the quick settings panel.
4. Look for a message such as USB, USB preferences, Charging this device via USB, or a similar connection notice.
5. Tap that message to open the USB options.
6. If you see choices like File Transfer, MTP, or Connect as camera, switch to the file transfer option first.
7. Disconnect the Kindle from the PC.
8. Plug it in again and check whether it now appears in File Explorer.
If your Kindle still does not show up, try the same menu again and switch to another available USB mode, such as "connect as camera", then reconnect once more.
Fix 7: Disable the USB Selective Suspend Feature
On Windows, USB selective suspend is turned on by default. This feature helps save power by temporarily putting an idle USB port to sleep. In most cases, it is useful and does not need to be changed. But if your Kindle keeps charging without being recognized, disconnects randomly, or appears for a moment and then disappears, this setting may be interrupting the connection.
To rule that out, follow these steps to turn it off and test the connection again.
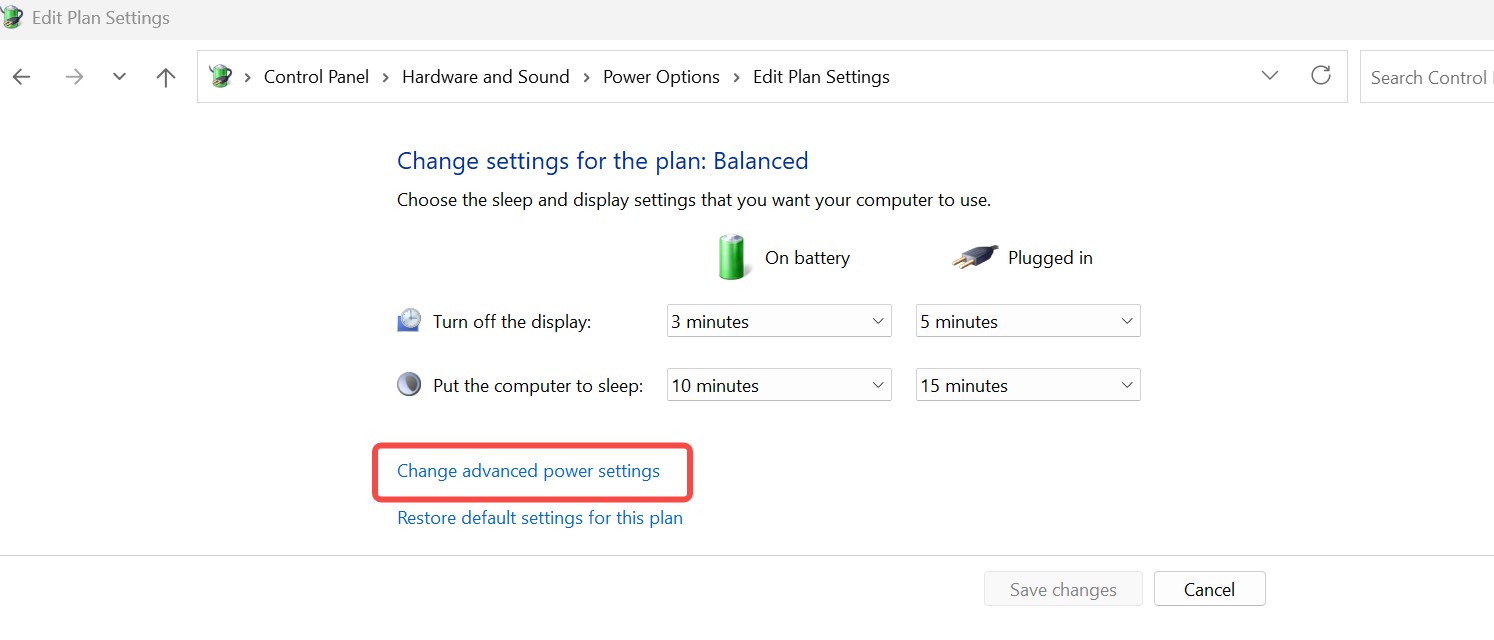
1. Open Control Panel, click Hardware and Sound, and select Select Power Options.
2. Find the power plan you are currently using, then click Change plan settings next to it.
3. Click Change advanced power settings.
4. In the new window, scroll down to USB settings and expand it. Expand USB selective suspend setting. Change the setting to Disabled. On a laptop, you may see two options: On battery and Plugged in. Set both to Disabled.
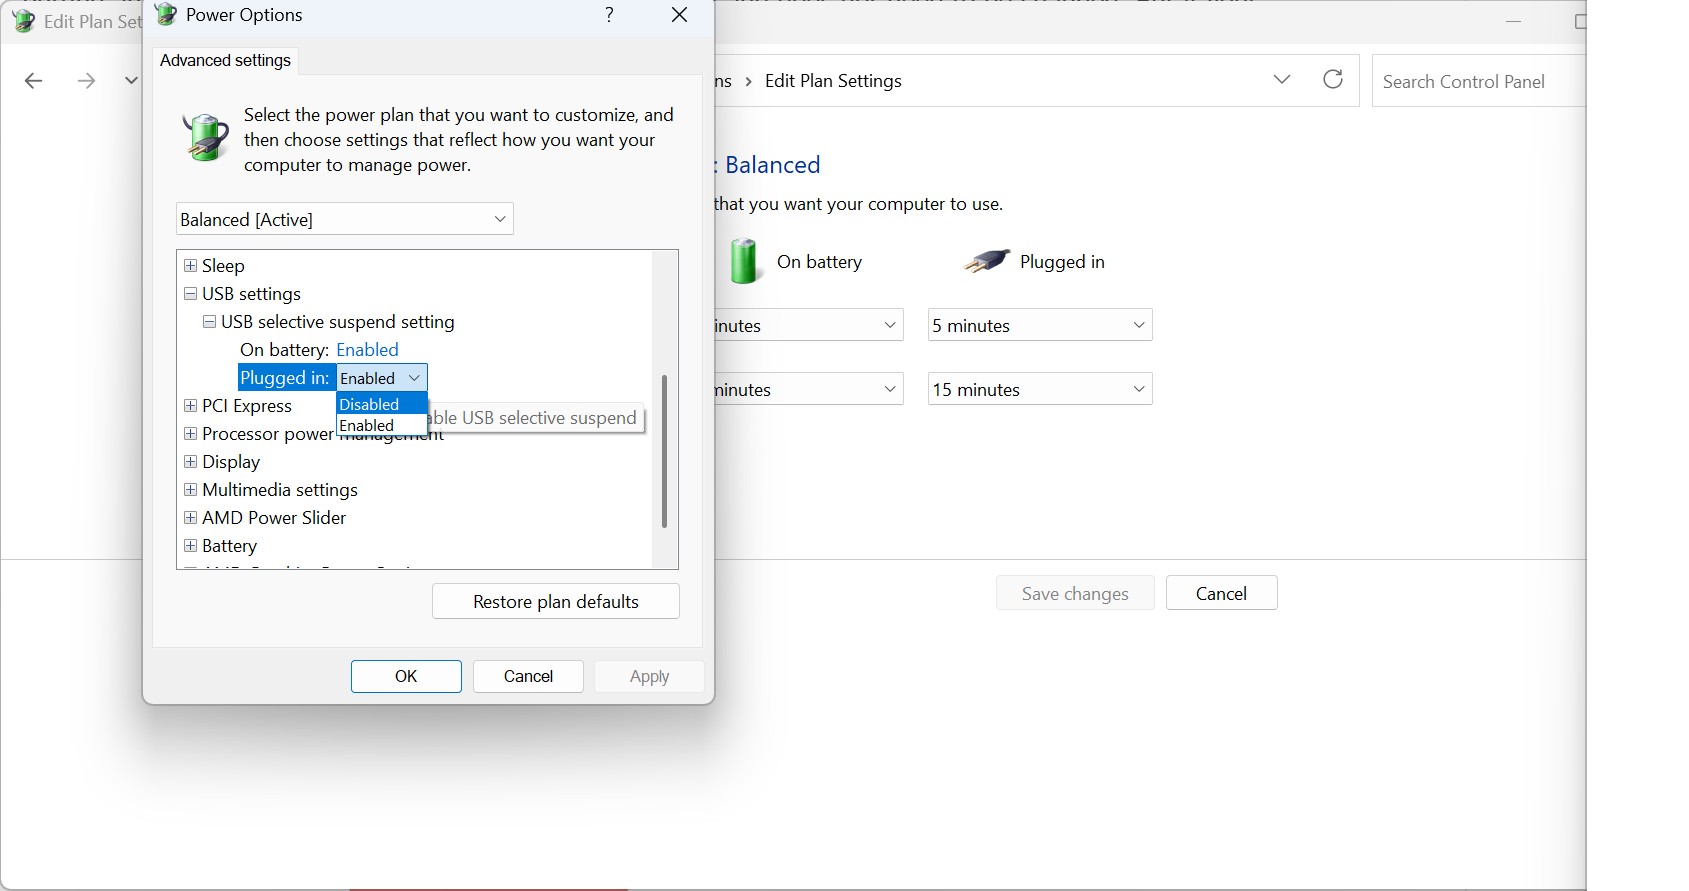
5. Click Apply, then OK. Restart the PC. After that, reconnect the Kindle and check whether it appears normally.
Fix 8: Connect Kindle to PC via Calibre
If your Kindle still does not show up properly in Windows, try connecting it through Calibre. This helps in two situations: your PC detects the Kindle inconsistently, or you want to check whether your Kindle can be recognized by ebook software even when File Explorer is unreliable. Calibre supports many ebook readers and shows a Device button on the toolbar when a supported device is detected.
Here is how to connect your Kindle to PC with Calibre:
1. Download and install Calibre on your PC.

2. Open Calibre before connecting your Kindle.
3. Use a USB cable that supports data transfer, then plug the Kindle directly into the computer.
4. Wait a few seconds and watch the top toolbar in Calibre.
5. If the Kindle is recognized, a Device button should appear automatically.
6. Click Device to check whether Calibre can read the Kindle storage.
7. If needed, add a book to Calibre first, then try sending it to the device to confirm the connection is working.
If Calibre detects the Kindle but Windows File Explorer still does not show it clearly, the issue is more likely related to how Windows is handling the device view rather than a complete connection failure. If Calibre does not detect it either, the problem is usually with the cable, USB port, driver, or the Kindle itself. Calibre's device controls only appear when a supported device is actually connected, so this is a useful way to confirm whether the connection is working at all.
One more thing to keep in mind: if you use Calibre to change Kindle collections over USB, those changes may not fully appear on the Kindle until the device is disconnected and restarted.
Fix 9: Refresh the Kindle Driver in Device Manager
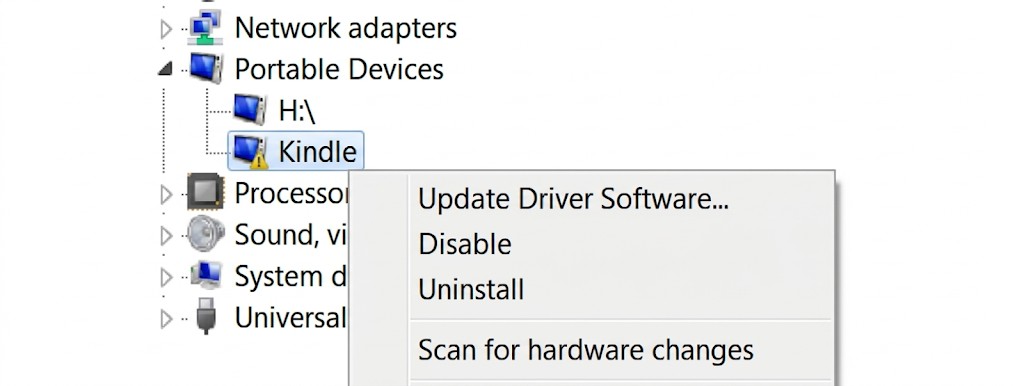
Open Device Manager on your PC and check whether the Kindle appears under Portable Devices, Disk drives, or USB devices. If you see Kindle, MTP Device, Kindle Internal Storage USB Device, or any item with a warning icon, refresh it there first. This is one of the most useful fixes when the device charges but still does not show up normally in Windows.
How to refresh the Kindle driver?
1. Connect the Kindle to your PC.
2. Press Windows + X and select Device Manager.

3. Click View at the top, then choose Show hidden devices.
4. Expand Portable Devices. If nothing relevant appears there, also check Disk drives and Universal Serial Bus controllers.
5. Under Portable Devices, find Kindle or MTP Device, right-click that item and choose Update Driver Software.
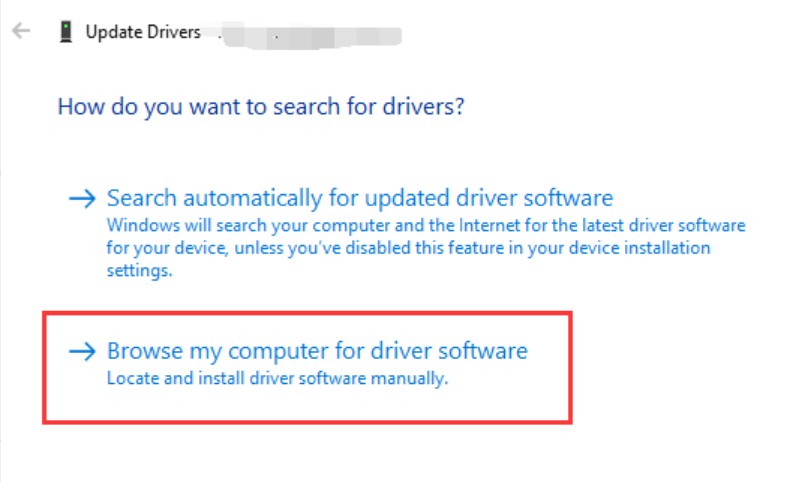
6. Select Browse my computer for drivers.
7. Select Let me pick from a list of available drivers on my computer.
8. Choose MTP USB Device, then click Next. If MTP USB Device does not appear in the list, click Have Disk and browse to this location: C:\Windows\INF\wpdmtp.inf
9. Wait for Windows to finish installing the driver.
10. Unplug the Kindle and reconnect it.
Then continue the installation and reconnect the Kindle. This file is the built-in Windows MTP driver source and can help when the normal list does not load correctly.
If the driver still does not refresh properly, right-click the same Kindle-related entry and choose Uninstall device, then unplug and reconnect the Kindle so Windows can detect it again from scratch. Microsoft's Device Manager guidance supports using uninstall and reinstall to force Windows to rebuild device detection when a driver is stuck or corrupted.
Fix 10: Enable ADB If Kindle Fire Isn't Showing up on PC
This method is only for Fire tablets, including older Kindle Fire models. It does not apply to most standard Kindle e-readers like Kindle Paperwhite or basic Kindle, which do not use ADB as a normal file transfer fix. Amazon's developer documentation places ADB setup under Fire tablets, not Kindle e-readers.
Here is how to enable ADB on a Kindle Fire tablet:
1. Open Settings on the tablet. Go to Device Options.
2. Locate Developer Options. If this option is not visible, tap Serial Number several times until Developer Options appears.
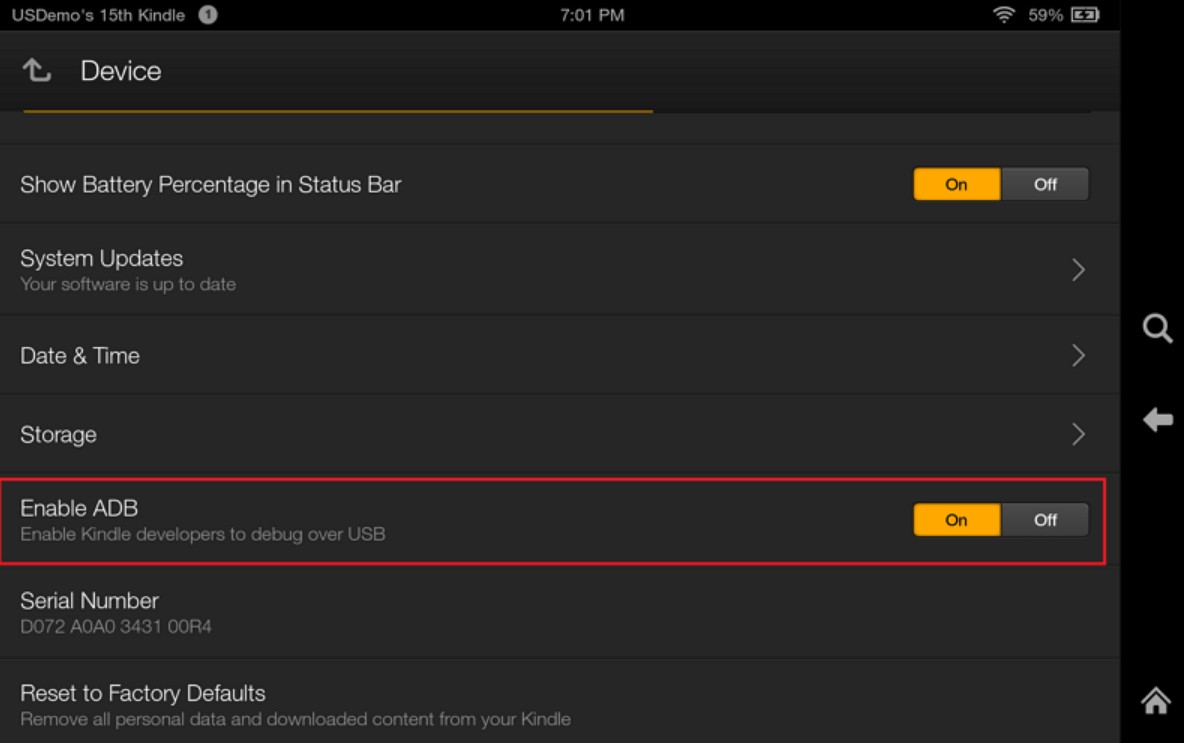
3. Open Developer Options. Turn on Enable ADB or USB debugging.
6. Connect the tablet to the PC with a data-transfer USB cable.
7. If a prompt appears on the screen asking to allow USB debugging, tap Allow.
8. On Windows, install the Fire tablet USB driver if the device is still not detected.
The Simplest Way to Connect Your Kindle to a PC
If you are connecting your Kindle to a PC mainly to transfer books for format conversion, fixing the USB connection may not be the only solution. A simpler option is to use Kindle for PC to download your books directly to your computer, then convert kindle books to PDF or EPUB with BookFab Kindle Converter. This way, you do not need to rely on a physical Kindle connection at all. If the device is not being recognized or the USB transfer keeps failing, this desktop workflow can save time and make ebook conversion much easier.
Conclusion
When a Kindle is not appearing on PC, the cause is usually something simple rather than a serious device problem. The most effective way to solve it is to go through the fixes one by one, starting with the easiest checks and then moving to the more technical ones if needed. Once the real cause is identified, the connection is often much easier to restore than expected.
 4 Easy Ways to Convert Kindle to PDFBy Amber Collins - May 18, 2026
 How to Print Kindle Books Without Losing QualityBy Amber Collins - May 14, 2026
![[Quick Solution] How to Remove Kindle DRM on Mac](https://images.dvdfab.cn/media/未命名的设计__87__crpyru.png/public) [Quick Solution] How to Remove Kindle DRM on MacBy Amber Collins - May 11, 2026
[Quick Solution] How to Remove Kindle DRM on MacBy Amber Collins - May 11, 2026 How to Download Kindle Books to PC in 2026 (The Complete Guide)By Amber Collins - May 9, 2026